
Ever wondered if your stained, tired-looking furniture could truly be saved? The answer is a resounding yes, and the proof is in the process. This guide moves beyond simple pictures to offer a deep dive into seven real-world upholstery cleaning before and after scenarios from right here in Buford, GA. We will break down the exact professional techniques used to tackle everything from stubborn pet stains on microfiber to devastating red wine spills on delicate leather, revealing the science behind each successful restoration.
You'll learn the 'how' and 'why' behind each transformation, exploring the strategies that revive fabric, eliminate odors, and bring furniture back from the brink. These aren't just makeovers; they are detailed case studies in effective, modern upholstery care. For each example, we will analyze the specific stain, the type of fabric, and the precise method that delivered incredible results. This provides you with a clear understanding of what's possible for your own furniture. Whether you're dealing with grease, ink, or smoke damage, understanding the approach is key. For effective deep cleaning across various fabric and material types, consider incorporating a specialized upholstery brush set into your toolkit. Get ready to see the true potential hidden beneath the grime.
1. Pet Urine Stain Removal on Microfiber Sofa
Pet urine on upholstery is a common yet challenging problem for homeowners. The issue goes beyond the visible stain; uric acid crystals embed deep within the fabric and padding, creating a persistent odor that worsens with humidity. This case study demonstrates how specialized techniques can completely eradicate both the stain and the smell, making it a powerful example in any collection of upholstery cleaning before and after transformations.
The "before" state typically shows distinct yellow or brownish discoloration, often surrounded by water rings from previous cleaning attempts. The "after" reveals a uniform, clean surface with no trace of the accident, restoring the furniture's appearance and hygiene.
Strategic Breakdown and Analysis
Successfully treating pet urine requires a multi-step chemical and mechanical process. The key is neutralizing the uric acid, not just masking the smell or lifting the surface-level pigment.
- Initial Assessment: Professionals like Stanley Steemer and Chem-Dry often use a black light to identify the full extent of the contamination, which is frequently much larger than the visible spot. This ensures the entire affected area is treated.
- Chemical Pre-treatment: The most critical step involves applying an enzymatic cleaner. These solutions contain beneficial bacteria that produce enzymes to break down and consume the uric acid crystals, effectively destroying the odor at its source.
- Hot Water Extraction: After allowing the enzymatic cleaner to dwell for at least 15-20 minutes, a hot water extraction (or steam cleaning) machine is used. This flushes the broken-down urine components and the cleaning solution from the fabric fibers, leaving them deeply sanitized.
Key Insight: The success of pet urine removal hinges on the chemical reaction of the enzymatic cleaner. Skipping this step and going straight to steam cleaning can actually "set" the stain and odor by permanently bonding the uric acid to the fibers with heat.
Actionable Takeaways for Homeowners
While a severe, set-in stain requires professional intervention, you can take immediate steps to mitigate damage.
- Blot, Don't Rub: Immediately blot fresh accidents with a clean, dry cloth to absorb as much liquid as possible.
- Use the Right Product: Apply a high-quality enzymatic cleaner specifically designed for pet urine. To learn more about how these powerful solutions work, you can explore this detailed guide on what an enzymatic cleaner is and why it's effective.
- Patience is Key: Allow the cleaner to dwell according to the product's instructions to give the enzymes time to work.
- Test First: Always test any cleaning solution on an inconspicuous area of the sofa to ensure it doesn't cause discoloration.
2. Red Wine Spill Restoration on Cream Leather Couch
A red wine spill on a light-colored leather couch is an emergency for any homeowner. The pigments and tannins in wine can quickly penetrate the porous surface of leather, causing a permanent stain if not addressed correctly. This transformation is a standout example in any gallery of upholstery cleaning before and after successes because it requires a delicate balance of potent cleaning and gentle preservation.
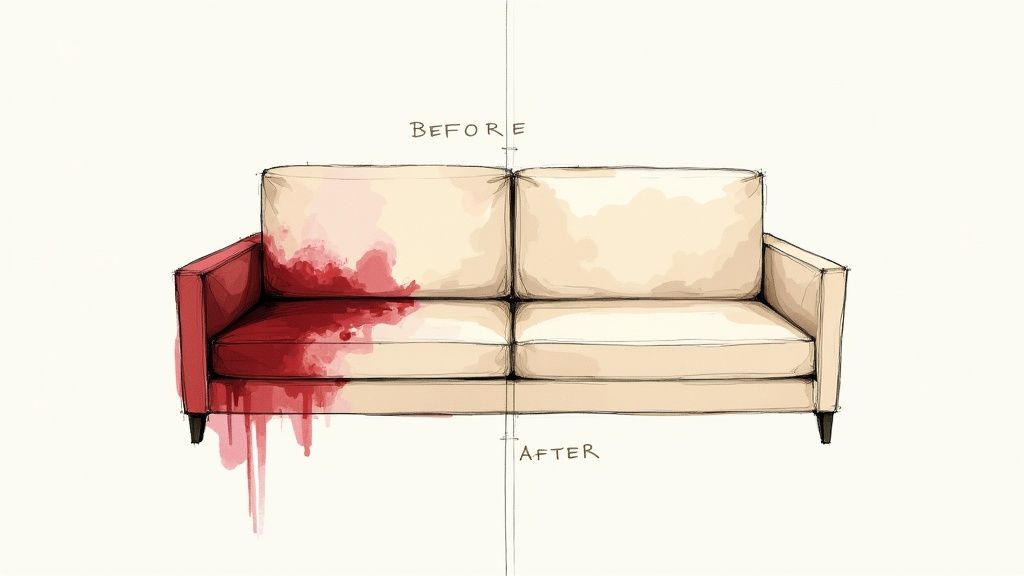
The "before" state features a deep purple or red stain, often with a darker ring where the liquid has begun to dry and set into the leather's grain. The "after" state shows a complete return to the original, uniform cream color, with the leather's texture and sheen fully intact and supple.
Strategic Breakdown and Analysis
Unlike fabric, leather cannot be flushed with water. The process demands specialized products that lift the stain without stripping the leather of its essential oils, which would lead to cracking and discoloration.
- pH-Balanced Cleaning: Professionals use pH-neutral or slightly acidic cleaners specifically formulated for leather. Harsh, alkaline cleaners can permanently damage the leather's finish and cause it to dry out.
- Gentle Agitation: A soft-bristled brush or microfiber cloth is used to gently agitate the cleaner, working it into the grain to lift the wine pigments from deep within the pores. This is done carefully to avoid scratching the surface.
- Conditioning and Rehydration: After the stain is removed, the most crucial final step is applying a high-quality leather conditioner. This replenishes the natural oils, restores flexibility, and creates a protective barrier against future spills.
Key Insight: The critical mistake to avoid with leather is using water or all-purpose cleaners. These can spread the stain and cause water damage or chemical burns to the material, making professional restoration far more difficult or even impossible.
Actionable Takeaways for Homeowners
Immediate and correct action can significantly improve the chances of a full recovery for your leather furniture.
- Blot Immediately: Use a clean, dry white cloth to blot the spill gently. Never rub, as this will push the wine deeper into the leather.
- Work from the Outside In: When applying a leather-safe cleaner, start at the edge of the stain and work your way to the center to prevent it from spreading.
- Test on a Hidden Spot: Before applying any product to the stain, test it on an inconspicuous area, like under a cushion, to ensure it doesn't cause discoloration.
- Always Condition After Cleaning: Cleaning strips some oils from the leather. Follow up with a dedicated leather conditioner to restore moisture and protect the finish.
3. Grease and Oil Stain Extraction from Fabric Recliner
Recliners and other frequently used furniture are magnets for body oils, hair products, and food grease, leading to dark, stubborn stains on headrests and armrests. This buildup not only looks unsightly but can also attract more dirt and degrade the fabric over time. This particular case study is a classic example in any upholstery cleaning before and after gallery because it tackles oil-based stains, which are notoriously difficult to remove with water-based cleaners alone.
The "before" state features a well-loved recliner with distinct, darkened patches where a person's head and arms would rest. The "after" photo shows the fabric restored to its original, uniform color, free from the grimy, oily residue and looking fresh and revitalized.
Strategic Breakdown and Analysis
Removing accumulated grease and oil requires a targeted approach that dissolves the oily compounds before the main cleaning begins. This dual-action process ensures the stain is lifted completely rather than just spread around.
- Initial Assessment: Professionals identify the nature of the stains. Body oils and food grease are non-water-soluble, meaning standard steam cleaning might be ineffective on its own and could even set the stain.
- Solvent-Based Pre-treatment: The crucial first step is applying a solvent-based pre-spotter or degreaser directly to the affected areas. These specialized agents are designed to break down and dissolve the oils, lifting them from the fabric fibers so they can be extracted.
- Hot Water Extraction: Following the pre-treatment, a deep hot water extraction (steam cleaning) is performed. This process flushes out the dissolved oils and the solvent, along with any embedded dirt and soil, sanitizing the entire piece of furniture for a consistent finish.
Key Insight: The success of grease removal lies in the pre-treatment phase. Attempting to remove heavy oil stains with only water and detergent can create a bigger mess by smearing the grease. A solvent degreaser is essential to dissolve the oil first.
Actionable Takeaways for Homeowners
While professional help is recommended for heavy buildup, you can manage and prevent these types of stains.
- Protect High-Contact Areas: Use armrest and headrest covers to prevent direct contact with hair and skin, significantly reducing oil accumulation.
- Vacuum First, Always: Before applying any cleaning solution, thoroughly vacuum the furniture to remove loose dirt and debris. This prevents you from turning dry soil into mud.
- Spot Treat Correctly: For minor grease spots, use a dry-cleaning solvent available at most stores. Apply a small amount to a clean white cloth and blot the stain gently from the outside in.
- Clean the Entire Piece: To avoid "clean spots," it’s best to clean the entire surface of the furniture, not just the stained area. For a comprehensive guide on this process, you can explore some great tips on how to clean your couch upholstery.
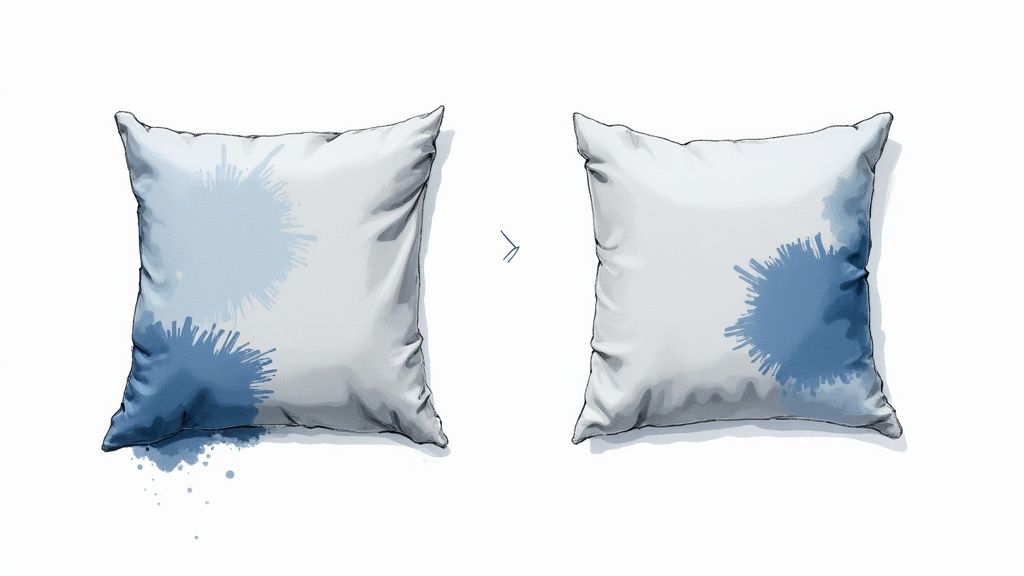
4. Mold and Mildew Remediation on Outdoor Cushions
Outdoor cushions are designed for durability, but improper storage in damp, poorly ventilated conditions can lead to unsightly and unhealthy mold and mildew growth. The issue is more than cosmetic; mold spores can trigger allergic reactions and degrade fabric integrity over time. This case study on outdoor cushion revival is a testament to how targeted treatments can save expensive furniture, making it a critical example in our series of upholstery cleaning before and after successes.

The "before" state features dark, speckled patches of black mold deeply embedded in the weave of the fabric, often accompanied by a musty odor. The "after" showcases a bright, sanitized, and vibrant surface, with the fabric restored to its original color and freshness, completely free of any microbial growth.
Strategic Breakdown and Analysis
Eliminating mold and mildew from porous fabrics like Sunbrella requires a process that kills the organism, removes the stain, and prevents its return. Simply pressure washing is often insufficient and can damage the material.
- Dry Removal and Assessment: The first step is to take the cushions outdoors and use a stiff brush to remove as much loose, dry mold as possible. This prevents spreading spores during the wet cleaning phase.
- Antimicrobial Treatment: A specialized mold and mildew cleaner, often containing oxygen bleach (sodium percarbonate), is applied. Unlike chlorine bleach, which can damage and discolor outdoor fabrics, oxygen-based cleaners kill mold and lift stains without compromising the material's color or strength. When tackling a serious problem, choosing from a list of effective home mold removal products can make all the difference.
- Thorough Rinsing and Drying: After the solution has dwelled, the fabric is thoroughly rinsed to remove all residue. The most crucial part of this stage is ensuring the cushions are completely dry. Air drying in direct sunlight is ideal, as UV rays help kill any remaining spores.
Key Insight: The critical mistake homeowners make is incomplete drying. Storing cushions that are even slightly damp will inevitably lead to the rapid regrowth of mold and mildew, undoing all cleaning efforts.
Actionable Takeaways for Homeowners
While professional cleaning is recommended for severe infestations, you can manage and prevent minor mildew issues with the right approach.
- Safety First: Always wear gloves and a mask when handling moldy items to avoid inhaling spores.
- Choose the Right Cleaner: Opt for an oxygen-based bleach or a cleaner specifically formulated for outdoor fabrics like those from 303 Products or Star brite. For related issues indoors, you can learn more about finding the right mildew remover for carpet.
- Sunlight is Your Friend: Allow cushions to dry completely in the sun after cleaning.
- Store Properly: During the off-season, store cushions in a dry, well-ventilated area, never in sealed plastic bags which can trap moisture.
5. Coffee and Food Stain Removal from Dining Chair Upholstery
Dining chairs are at the frontline of spills, accumulating a variety of stains from coffee and wine to food grease and sauce splatters. Over time, these individual spots merge into a general dinginess that makes the entire set look old and unhygienic. This example demonstrates how a targeted approach can reverse years of daily use, making it a classic case study in any gallery of upholstery cleaning before and after successes.
The "before" state features a patchwork of brown coffee rings, reddish sauce marks, and mystery blotches on a light-colored fabric. The "after" showcases fabric that is uniformly clean, bright, and free of any discoloration, effectively restoring the dining set's original elegance.
Strategic Breakdown and Analysis
Treating multiple types of stains on a single piece requires a versatile strategy that addresses each spill's unique chemical makeup before performing a general cleaning. This prevents smearing or setting the stains permanently.
- Stain Identification: The first step is to identify the nature of the stains. Coffee and tea are tannin stains, while many food splatters are protein-based or oil-based. Each requires a different chemical approach.
- Targeted Spot Treatment: Professionals apply specific solutions to each type of stain. A tannin remover is used on coffee and wine rings, while a protein spotter might be applied to food spills. This pre-treatment dissolves the specific stain molecules.
- Gentle Agitation and Extraction: After the spotters have dwelled, the areas are gently agitated with a soft brush to lift the stain from the fibers. Following this, a low-moisture hot water extraction process is used to rinse the entire chair pad, removing the dissolved stains and cleaning solution without over-saturating the fabric.
Key Insight: Applying one general cleaner to multiple, varied stains is often ineffective. The success of this restoration depends on using specialized spot removers to break down each stain at a molecular level before the overall cleaning process begins.
Actionable Takeaways for Homeowners
While a professionally cleaned set will look best, you can manage spills to prevent them from becoming permanent fixtures on your dining chairs.
- Act Quickly: Blot fresh spills immediately with a clean, white cloth. Never rub, as this pushes the stain deeper into the fabric.
- Use Cold Water First: For many food and drink spills, gently dabbing with a cloth dampened with cold water can lift a significant portion of the stain without setting it.
- Address Tannins Separately: For coffee or tea, apply a dedicated tannin spot remover according to the product directions before attempting any other cleaning.
- Test on a Hidden Spot: Always test any cleaner on an inconspicuous area, like the underside of the seat, to ensure it doesn't cause discoloration or damage to the fabric.
6. Ink and Dye Transfer Removal from Light-Colored Velvet Sofa
Ink stains and dye transfer on light-colored velvet represent one of the most feared and challenging upholstery disasters. These pigment-based stains bond quickly with delicate velvet fibers, and improper cleaning attempts can easily cause permanent setting, color bleeding, or damage to the fabric’s signature pile and sheen. This transformation is a testament to the power of specialized solvent chemistry and meticulous technique, making it an impressive entry in our upholstery cleaning before and after gallery.
The "before" state reveals a nightmare scenario: a prominent blue ballpoint pen mark on a seat cushion, compounded by a widespread, streaky blueish haze on the backrest from denim dye transfer. The "after" photo shows a flawless, uniform light gray surface, with the velvet's texture and luster fully restored.
Strategic Breakdown and Analysis
Treating two different types of pigment stains on a sensitive fabric like velvet requires a careful, targeted approach. A one-size-fits-all solution would fail and likely ruin the sofa. The process involves dissolving and lifting the specific pigments without harming the textile.
- Stain Identification: The first step is to correctly identify the stains. Ballpoint ink is typically an oil-based dye, while denim transfer is a loose, water-soluble dye. Each requires a different chemical solvent for effective removal.
- Targeted Solvent Application: A volatile solvent like isopropyl alcohol is used for the ink. It is carefully dabbed onto the stain with a white cloth to dissolve the ink, which is then blotted up. For the dye transfer, a specialized color run remover or dye-attracting agent is applied to lift the blue pigment without affecting the sofa's original gray dye.
- Controlled Extraction and Grooming: After treatment, a low-moisture extraction method is used to rinse the solvents and lifted pigments. Finally, the velvet pile is gently brushed with a velvet brush while damp and again after drying to restore its uniform direction and soft texture.
Key Insight: The critical factor in velvet cleaning is control. Aggressive rubbing or oversaturation with liquid will crush the pile and create water rings. The "dab and blot" method with minimal moisture is essential to dissolve the stain without spreading it or damaging the fabric structure.
Actionable Takeaways for Homeowners
While complex stains like these are best left to professionals, quick action can improve the chances of complete removal.
- Act Fast on Ink: For fresh ballpoint ink, gently dab the spot with a clean white cloth lightly dampened with isopropyl alcohol.
- Blot, Never Rub: Rubbing drives the ink or dye deeper and can permanently damage the velvet's pile. Always use a gentle dabbing or blotting motion.
- Test Solvents: Before applying any cleaner or solvent, test it on a hidden area like the underside of a cushion to check for any color loss or texture change.
- Prevent Future Stains: Use decorative throws or blankets on light-colored furniture, especially if you or your guests often wear dark, new denim. This is the easiest way to prevent dye transfer.
7. Smoke Damage and Odor Elimination from Fabric Sectional
Smoke damage from a house fire, even a small one, can ruin upholstered furniture far from the actual flames. Soot particles and pungent odor molecules deeply penetrate fabric fibers, leaving a stubborn yellow or grey film and an overpowering smoky smell. This case study on a fabric sectional highlights a dramatic restoration, proving that even pervasive smoke damage can be reversed, a crucial example for any upholstery cleaning before and after showcase.
The "before" state features a dingy, discolored sectional with visible soot settling on the arms and back. The "after" image presents a piece with its original color fully restored, completely free of residue and, most importantly, the persistent, unpleasant odor associated with fire damage.
Strategic Breakdown and Analysis
Eliminating smoke damage requires more than surface cleaning; it's a multi-faceted process targeting both visible soot and invisible odor molecules. The goal is complete neutralization, not just temporary masking.
- Initial Assessment and Soot Removal: Restoration professionals, following IICRC protocols, first use high-powered, HEPA-filtered vacuums to carefully lift dry soot from the surface. Wiping or rubbing can permanently embed the carbon particles into the fabric.
- Deodorization and Thermal Fogging: The core of the process is deep deodorization. Thermal fogging is often employed, where a deodorizing agent is heated into a fine mist. This mist mimics the behavior of smoke, penetrating deep into the fabric and foam to neutralize odor molecules at their source.
- Deep Cleaning with Counteractants: Following deodorization, a specialized hot water extraction process is used with cleaning solutions containing odor counteractants. This flushes out the soot, the cleaning agent, and any remaining neutralized odor particles, leaving the fabric sanitized and fresh.
Key Insight: The success of smoke odor removal depends on treating the odor like smoke itself. Thermal fogging allows the neutralizing agent to travel the same paths the smoke did, reaching every hidden crevice of the furniture's frame and padding for total elimination.
Actionable Takeaways for Homeowners
While significant smoke damage requires professional intervention for safety and effectiveness, you can take important preliminary steps.
- Ventilate Immediately: Air out the affected area as much as possible to reduce the concentration of airborne soot and odor.
- Avoid DIY Wiping: Do not try to wipe soot off upholstery. This will smear the oily residue and drive it deeper into the fibers, making professional removal much more difficult.
- Seek Professional Assessment: Contact a certified restoration company like Citrus Carpet Cleaning Buford. They can determine if the furniture is salvageable and have the specialized equipment, such as hydroxyl generators or thermal foggers, necessary for the job.
- Document Everything: Take detailed photos of the damage before any cleaning begins for your insurance claim.
Before & After: 7 Upholstery Cleaning Case Comparisons
| Case | 🔄 Implementation Complexity | Resources & ⚡ Efficiency | 📊 Expected Outcome (⭐) | Ideal Use Cases | 💡 Key Tips |
|---|---|---|---|---|---|
| Pet Urine Stain Removal on Microfiber Sofa | Medium–High: enzymatic pre‑treat + hot water extraction; professional technique | Enzyme cleaner, high‑temp extractor, pH rinse; 1–2 hr work + 4–6 hr dry (⚡ moderate) | Complete stain & odor removal; fabric restored ⭐⭐⭐⭐⭐ | Pet urine on microfiber, odor remediation in family homes | Blot fresh stains, use urine‑specific enzyme, 10–15 min dwell, test hidden area |
| Red Wine Spill Restoration on Cream Leather Couch | Medium: pH‑balanced leather cleaning + gentle agitation; careful handling | Leather cleaners, soft brush, conditioner; 30–60 min + 2–3 hr dry (⚡ fast) | Dramatic color restoration, suppleness preserved ⭐⭐⭐⭐ | Tannin spills on aniline/cream leather, high‑value pieces | Blot (don’t rub), use leather‑specific products, test first, follow with conditioner |
| Grease and Oil Stain Extraction from Fabric Recliner | Medium–High: solvent pre‑spotting + extraction + encapsulation | Solvent spotters, hot water extractor, encapsulation polymers; 45–90 min + 3–5 hr dry (⚡ moderate) | Strong visual recovery; oils dissolved, re‑soiling reduced ⭐⭐⭐⭐ | Greasy high‑contact synthetic upholstery, restaurants, heavy‑use seating | Vacuum first, pre‑treat grease with solvent, ensure ventilation, clean whole piece |
| Mold and Mildew Remediation on Outdoor Cushions | Medium: antimicrobial + oxygen bleach + controlled pressure wash; safety critical | Mold killers, oxygen bleach, pressure washer, PPE; 2–4 hr incl. sun drying (⚡ moderate) | Sanitized fabric, complete mold spore removal, UV protection restored ⭐⭐⭐⭐ | Sunbrella/solution‑dyed outdoor cushions, damp‑storage mold | Wear PPE, brush off dry mold, use oxygen bleach for outdoor fabrics, dry thoroughly |
| Coffee and Food Stain Removal from Dining Chair Upholstery | Low–Medium: targeted spot treatments + low‑moisture overall clean | Tannin remover, enzyme for protein stains, low‑moisture equipment; 30–45 min/chair + 2–3 hr dry (⚡ quick) | Uniform stain removal, color clarity restored ⭐⭐⭐⭐ | Dining chairs, linen/cotton blends, restaurant seating | Blot immediately, use cold water for protein stains, use minimal moisture, test first |
| Ink and Dye Transfer Removal from Light‑Colored Velvet Sofa | High: solvent ink removal + dye transfer work + pile restoration | Isopropyl/alcohol solvents, dye removers, steam/brush tools; 2–4 hr careful work (⚡ slow) | Possible complete removal but higher risk of color/fabric damage ⭐⭐⭐ | Light velvet with fresh ink or denim transfer, designer upholstery | Act fast, dab not rub, test solvents, restore pile with velvet brush, consider pro help |
| Smoke Damage and Odor Elimination from Fabric Sectional | High: multi‑step (thermal fogging, hydroxyl, extraction); specialized procedures | Thermal fogger, hydroxyl generator, deodorizing extraction; 4–8 hr over 1–2 days (⚡ low) | Deep particulate removal and true odor neutralization ⭐⭐⭐⭐ | Smoke‑affected sectional after fire/smoke exposure, insurance restoration | Address quickly, use professional assessment, prefer hydroxyl in occupied spaces, document for claims |
From 'Before' to 'Beautiful': Your Furniture's Next Chapter
Throughout this showcase of upholstery cleaning before and after transformations, we have journeyed through some of the most challenging scenarios homeowners and businesses face. From the stubborn pet urine stains on a well-loved microfiber sofa to the delicate removal of ink from a velvet sectional, each example tells a story of restoration and renewal. The common thread weaving through these successes is not just the application of cleaning solutions, but a deep understanding of the problem at hand.
We've analyzed how different materials, from durable leather to porous outdoor cushions, react to specific contaminants like red wine, grease, and even mold. The key insight is that a one-size-fits-all approach is a recipe for failure. Effective restoration hinges on a precise strategy: identifying the fabric type, understanding the stain's chemical composition, and applying a targeted treatment that cleanses without causing damage. These dramatic visual results underscore the power of professional expertise and specialized tools.
Key Takeaways for Your Upholstery
Reflecting on these transformations, several core principles emerge:
- Speed is Crucial, But Strategy is King: While acting fast can prevent a spill from setting, using the wrong product can make it permanent. The most important first step is identifying the stain and fabric before attempting any DIY solution.
- Fabric Knowledge is Non-Negotiable: As seen with the leather couch and velvet sofa, the cleaning method must respect the material's unique properties. A technique that works wonders on microfiber could irreversibly damage a more delicate fabric.
- Beyond the Stain Lies the Odor: The smoke-damaged sectional and the pet-stained sofa both highlighted a critical point: true cleaning addresses both visible stains and invisible, embedded odors. This often requires specialized deodorizing and sanitizing treatments.
Mastering these concepts is invaluable because it transforms your perspective from one of panic to one of preparedness. Instead of seeing a spill as the end of your furniture’s life, you can see it as a solvable problem. This knowledge empowers you to make informed decisions, protecting your investment and maintaining a healthier, cleaner home environment.
The stunning upholstery cleaning before and after images are more than just satisfying visuals; they are proof that even the most distressed furniture can be brought back to life. They represent the bridge between a well-used piece filled with memories and a revitalized centerpiece ready for its next chapter. Your furniture tells the story of your life, and with the right care, that story can continue beautifully for years to come.
Ready to write your own success story? If these transformations have inspired you to see the hidden potential in your own furniture, let Citrus Carpet Cleaning Buford create your "after" moment. Visit Citrus Carpet Cleaning Buford to get a free 'EXACT-imate' and experience the power of our low-moisture, citrus-based cleaning system.