
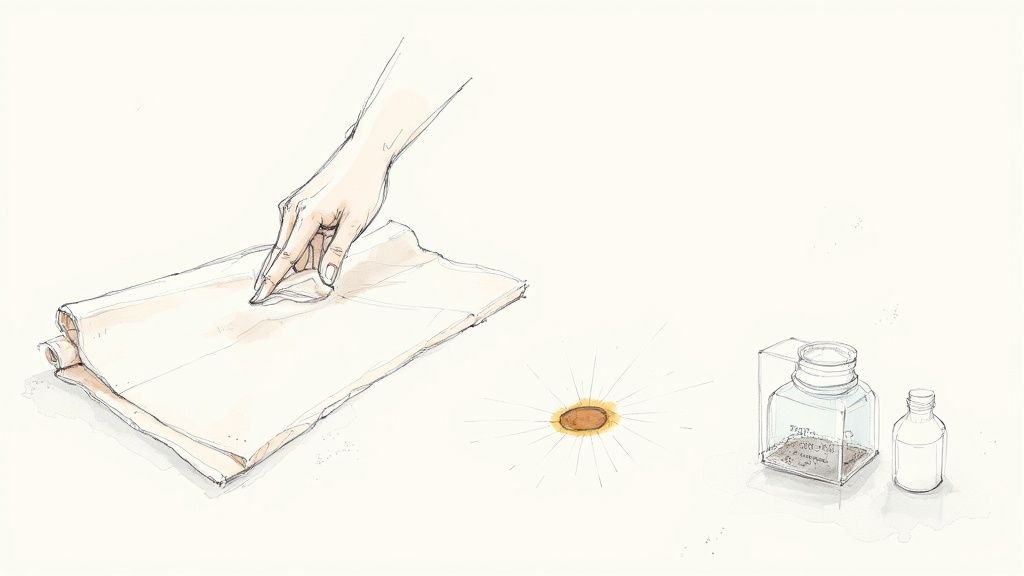
When you find a fresh accident, the most important first step is to blot the area immediately with clean towels. Whatever you do, don't rub. Your goal is to absorb as much of the urine as possible before it has a chance to soak deep into the carpet padding. This initial damage control is truly your best defense against a lasting stain and that lingering smell.
Your First Response to a Fresh Urine Stain
That sinking feeling when you spot a fresh, wet circle on the carpet is something every dog owner knows. What you do in the next few minutes is absolutely critical. Speed is everything here.
You're in a race against time to stop that urine from seeping past the carpet fibers and into the padding underneath. Once it hits the pad, getting rid of the odor becomes a whole different ballgame.
The biggest mistake I see people make is grabbing a cloth and scrubbing furiously. This just forces the liquid deeper into the carpet and can even fray the fibers, making the stain look bigger and more permanent. The key is to lift the urine out, not push it in.
To help you act fast without thinking, here's a quick reference for those critical first moments.
Immediate Action Quick Reference Guide
| Action | Tool/Material | Why It Works |
|---|---|---|
| Blot Heavily | Clean, dry towels or thick paper towels | Lifts and absorbs the maximum amount of liquid out of the carpet fibers instead of pushing it down. |
| Apply Pressure | Your own body weight (stand on the towels) | Maximizes absorption by compressing the carpet and pad, forcing the liquid up into the towel. |
| Repeat Blotting | Fresh, dry towels | Ensures you're not just moving wetness around. You continue until no more moisture transfers to the towel. |
| Neutralize Odor | 50/50 mix of white vinegar and water in a spray bottle | The acetic acid in vinegar starts breaking down the ammonia in the urine, tackling the odor at its source. |
These steps are your frontline defense and can make a huge difference in the final outcome.
The Blotting Technique Explained
Grab several clean, dry towels—microfiber works great, but any absorbent towel will do. You can also use a thick stack of paper towels. Lay them directly over the wet spot and apply firm, steady pressure.
The best way to do this? Just stand on the towels. Use your body weight to really press down and maximize absorption. You'll probably need to swap out the wet towels for fresh, dry ones a few times. Keep at it until you press down and the new towel comes up dry. This one action removes the bulk of the problem before you even start cleaning.
A Simple DIY Solution for Right Now
After you’ve blotted up as much as you can, it’s time to neutralize what’s left. A simple but effective DIY cleaner is a mix of equal parts white vinegar and water in a spray bottle. The vinegar is fantastic for neutralizing the ammonia in urine, which is a major source of that sharp smell.
Key Takeaway: The goal isn't just to clean the surface; it's to stop the uric acid from crystallizing and bonding to the carpet fibers. This crystallization is the real culprit behind those phantom odors that reappear on humid days.
Spray your vinegar solution generously over the spot. You want to make sure it penetrates as deeply as the urine did, so don’t be shy with it. Let that sit for about five to ten minutes. For more pro tips, check out our guide on the best way to clean up after a pet accident.
Next, sprinkle a good amount of baking soda over the damp, vinegar-treated area. You might hear a little fizzing as it reacts with the vinegar—that’s a good sign! This combo works to lift the stain and deodorize even further.
Let the baking soda dry completely. This can take several hours or even overnight, but be patient. Once it's bone dry, just vacuum it all up thoroughly. With over 67% of U.S. households owning a pet, this is a routine that saves millions of carpets every year.
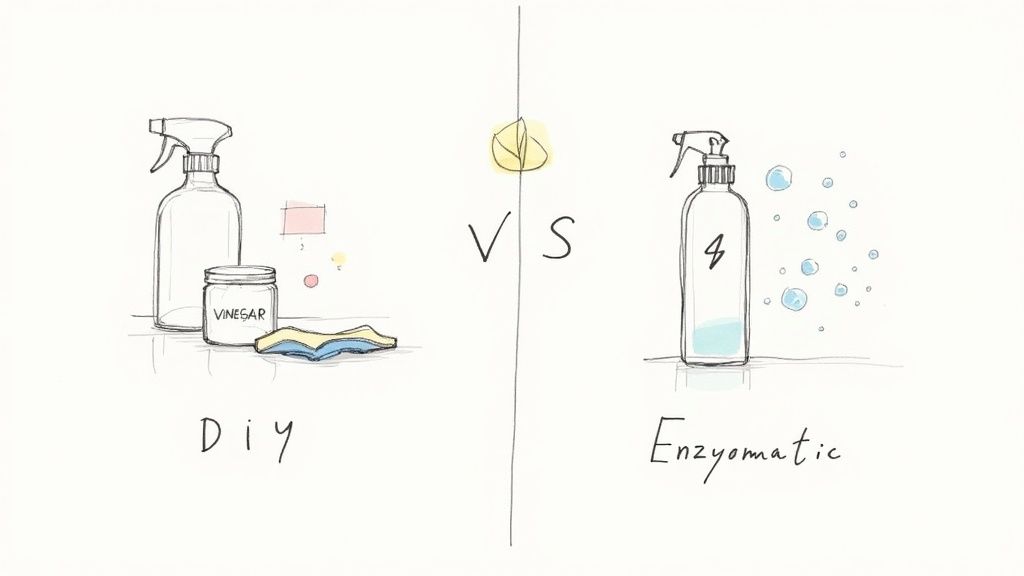
Choosing Your Cleaning Method: DIY vs. Enzymatic Cleaners
Alright, you've blotted up the initial puddle. Now comes the real decision, the one that determines whether you actually get rid of that spot for good or just hide it temporarily. Do you grab some stuff from under the kitchen sink, or do you go for a product designed specifically for this kind of mess?
Honestly, both can work. But they operate on completely different principles. What you choose really depends on how bad the accident was, how long it’s been sitting there, and whether you're trying to prevent a repeat performance.
The Power Of A DIY Vinegar Solution
For a fresh, small accident, a homemade cleaner can be surprisingly effective. The classic go-to recipe is cheap, easy, and uses things you probably already have lying around.
- Mix: Just combine equal parts white vinegar and cool water in a spray bottle. Simple.
- Apply: Spray the spot lightly. You want to saturate it enough to get as deep as the urine did, but don't create a swamp.
- Dwell: Give it about 5-10 minutes to work its magic.
The secret sauce here is the acetic acid in the vinegar. It’s great at neutralizing the alkaline ammonia in fresh dog urine—that’s where that sharp, nasty smell comes from. Think of it as your first line of defense for surface-level stuff.
After the vinegar solution has sat for a bit, you can sprinkle a layer of baking soda over the damp area. The baking soda is a fantastic helper for pulling out any leftover moisture and odors as it dries. Once it’s totally dry, just vacuum it all up.
The Science Behind Enzymatic Cleaners
While that vinegar trick is good for neutralizing the immediate smell, it doesn't touch the real villain: uric acid crystals. These little crystals are the reason a urine smell can suddenly reappear on a humid day, months after you thought you cleaned it. They aren’t water-soluble, so regular cleaners just can't break them down.
This is where enzymatic cleaners earn their keep.
These aren't just fancy soaps. They are bio-active formulas loaded with specific enzymes and beneficial bacteria that are literally hungry for the stuff in pet urine.
The enzymes in these cleaners actually "eat" the uric acid, proteins, and other organic matter, breaking them down into simple, harmless things like carbon dioxide and water. This process doesn't just cover up the smell—it completely eliminates the source.
That biological breakdown is the only way to truly destroy the very components that signal to your dog, "Hey, this is a great spot to pee again!" It's no wonder the U.S. pet odor control market hit USD 6.47 billion in 2023, with enzyme cleaners leading the way. They just plain work.
If you really want to nerd out on the science, our article on what an enzymatic cleaner is breaks it all down. For set-in stains, big messes, or areas where your dog keeps having accidents, an enzymatic cleaner is always going to be the better choice.
DIY vs. Enzymatic Cleaners: A Head-to-Head Comparison
To make it even clearer, let's put these two methods side-by-side. It helps to see exactly what you're getting with each approach.
| Feature | DIY Solution (Vinegar & Baking Soda) | Enzymatic Cleaner |
|---|---|---|
| Cost | Very low—uses common household items. | Higher initial cost per bottle. |
| Effectiveness | Good for neutralizing ammonia in fresh urine. | Excellent for breaking down all urine components, including uric acid. |
| Odor Removal | Masks or neutralizes surface-level odors. | Eliminates odors at the source by destroying molecules. |
| Stain Removal | Can be effective on new, light-colored stains. | Highly effective on both fresh and old, set-in stains. |
| Prevention | Does not remove the uric acid that attracts pets back to the spot. | Eliminates the scent markers that encourage repeat accidents. |
| Best For | Minor, fresh accidents on the surface of the carpet. | Old stains, deep saturation, and preventing repeat soiling. |
Ultimately, while a DIY solution can handle a small, fresh spill in a pinch, it's more of a band-aid. For a true, deep clean that ensures the stain and smell are gone for good, investing in a quality enzymatic cleaner is the way to go. It’s the difference between a temporary fix and a permanent solution.
Alright, you've picked your weapon of choice—be it a high-tech enzymatic cleaner or a trusty DIY vinegar mix. Now comes the part where the magic actually happens. This isn't just a "spray and pray" situation; you have to be methodical to make sure you get every last drop.
Think of it like watering a thirsty plant. You don't just spritz the leaves, right? You soak the soil so the water gets down to the roots. It's the exact same idea here. Your cleaning solution has to go as deep as the urine did, or you're just cleaning the surface.
Getting Your Cleaner on the Stain
First things first, get that cleaner on the spot—and don't be stingy. If you're using a spray bottle, you want to completely saturate the area. A good rule of thumb is to spray about 20-30% wider than the stain you can see. Trust me, urine spreads out under the carpet fibers like a pancake.
If you’re using your vinegar solution, pour it slowly so it has a chance to really soak in. For store-bought enzyme cleaners, just follow the directions on the bottle, but saturation is almost always the key. This is how you ensure the active ingredients can get to work on all the nasty urine crystals.
Pro Tip: Got an old, dried stain and you're not sure where it starts or ends? Grab a small UV blacklight. Turn off the lights, and those old urine salt deposits will glow, showing you exactly where you need to treat. It's a game-changer for finding every hidden spot.
Why You Can’t Skip "Dwell Time"
Once you've applied the cleaner, the most important thing you can do is… nothing. Just let it sit. This is called dwell time, and it’s non-negotiable, especially for enzyme cleaners. Those little enzymes are like tiny Pac-Men, and they need time to literally eat and break down the uric acid crystals.
Rushing this part is like pulling a cake out of the oven five minutes after you put it in. It just won't work.
- Enzymatic Cleaners: Give them at least 15-20 minutes. For really stubborn or old stains, you might need to let it sit for a few hours. Some pros I know will even cover the spot with a damp towel to keep the enzymes active longer.
- DIY Vinegar Solution: Let it sit for about 10-15 minutes. That’s plenty of time for it to neutralize the ammonia smell.
While the cleaner is working, keep kids and pets away from the area. Let the solution do its thing without being disturbed.
Rinsing the Right Way (Without Creating a Swamp)
After the cleaner has had enough time to work its magic, you need to "rinse" it out. And no, I don't mean dumping a bucket of water on your floor—that's a fast track to mold and subfloor damage.
Instead, grab a clean, damp cloth and start blotting. Your goal is to lift the solution out of the carpet, not push it deeper. Keep rinsing your cloth and blotting until the area doesn't feel soapy anymore.
Honestly, a wet-vac is your best friend for this step. It will suck out way more moisture from the carpet and the padding than you ever could by hand. This makes a huge difference in drying time and helps make sure no sticky residue gets left behind.
The Final Step: Making Sure It's Bone Dry
Last but not least, the area has to get completely dry. Any lingering moisture is just an open invitation for mildew.
Point a fan directly at the spot to get the air moving. If you've got a floor vent nearby, open it up. Depending on the humidity in your house and how thick your carpet is, drying could take anywhere from a few hours to a full day. Don't call it done until it's bone dry to the touch.
And hey, if you're tackling pet messes, you might be in the mood for a bigger cleaning project. For more tips on keeping your whole home fresh, check out this helpful general spring cleaning guide. A clean home all around definitely helps keep pet issues from feeling overwhelming.
How to Handle Old Stains and Lingering Odors
There’s nothing quite like finding a dried, mystery urine stain. It's way more frustrating than catching one fresh. By the time you find it, the urine has soaked deep into the carpet padding, and its uric acid has crystallized, bonding to the fibers. This creates a stubborn stain and a smell that just loves to reappear on humid days.
Unlike a fresh puddle, you can't just blot an old stain away. The trick is to essentially turn it back into a fresh one. Rehydrating the spot is the absolute first step to making it treatable again.
Rehydrating the Stain to Reactivate It
First things first, you’ve got to get that old spot damp again. Lightly spray the area with some warm water—don't soak it, just enough to loosen up the dried urine locked in the fibers. Let the water sit for a minute or two to work its magic.
Once it's damp, grab some clean, dry towels and blot firmly, just like you would with a new accident. Put your weight into it! This helps pull some of that re-liquefied urine out before you even get to the real cleaning. I’d repeat this a couple of times to get as much of the old mess out as possible.
Why Enzymatic Cleaners Are Non-Negotiable Here
For an old stain, that trusty vinegar solution just isn't going to cut it. This is where an enzymatic cleaner becomes your best friend. These cleaners are packed with active enzymes that literally break down and eat the uric acid crystals—the real source of that lingering smell.
This biological process is the only thing that truly gets rid of the odor at its source. A standard cleaner might make the spot look better, but it leaves behind invisible uric acid crystals. That’s why the smell always comes back.
Crucial Insight: Ever notice the pee smell returns on a rainy day? You're not imagining it. Humidity reactivates those leftover uric acid crystals, releasing that ammonia odor back into your home. An enzymatic cleaner destroys the crystals, stopping that nasty cycle for good.
If you want to get into the weeds on this, you can learn more about removing pet urine smell from carpet and see why sometimes a professional-grade solution is the only way to go for stubborn odors.
This simple graphic breaks down the essential process for using these types of cleaners effectively.
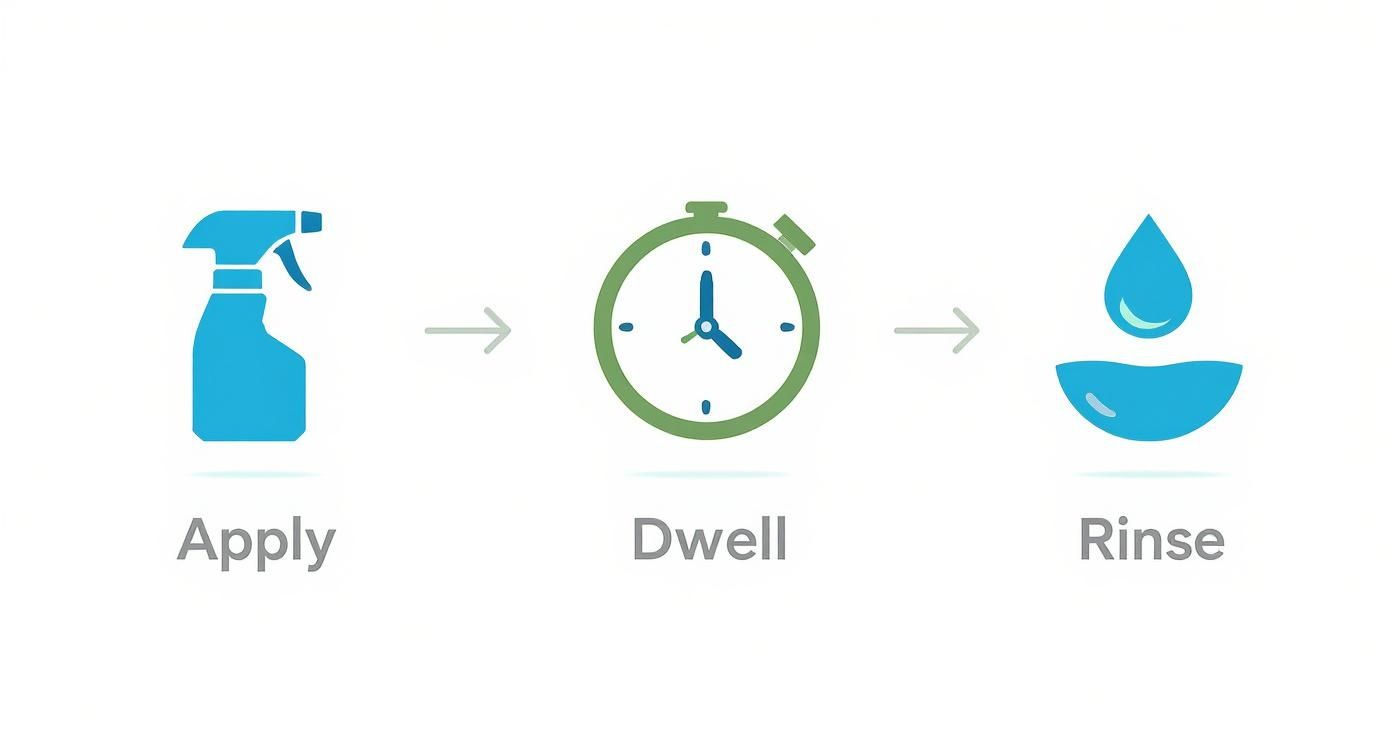
As you can see, it's a three-stage attack: apply the cleaner, let it sit long enough to work (dwell time is critical!), and then rinse or extract it completely. If you rush or skip a step, you’re just wasting your time and money.
Multi-Application Strategies for Tough Spots
Some stains are just plain stubborn, especially if your pet has a favorite "go-to" spot. If that’s the case, one round of cleaning probably won't be enough. Don't get discouraged if the stain or smell is still there after your first try.
For those nightmare spots, you'll need to hit it more than once:
- First Pass: Rehydrate, blot, and then clean the area thoroughly with your enzymatic cleaner. Follow the product’s directions and let it dry completely.
- Second Pass: If you can still see a faint stain or catch a whiff of odor, do it all over again. Really saturate the area this time, and let the cleaner dwell for a long time—you can even cover it with a damp towel overnight to keep it working. Then, extract it all out.
- Final Check: Once it’s totally dry after the second round, break out a blacklight. This will show you if any urine salts are left behind.
If you’ve tried cleaning the same spot multiple times and the odor just won’t quit, the problem might be deeper. The urine could have soaked all the way through to the subfloor. At that point, cleaning the carpet isn't going to fix it, and it’s time to call in a pro for an assessment.
Knowing When to Call a Professional Carpet Cleaner
Listen, DIY methods are great for tackling one-off accidents. But there are times when you're just outgunned. Knowing when to throw in the towel and call for backup isn’t a sign of defeat—it’s the smartest move you can make to protect your carpet and your home's air quality.
Some situations simply demand more power than a spray bottle and elbow grease can deliver.
One of the biggest red flags is when the problem becomes widespread. If you're dealing with multiple accidents from a new puppy, an older dog, or a pet with health issues, you're looking at a problem that has almost certainly soaked deep into the carpet padding. At that point, you're not just cleaning the surface anymore.
Another tell-tale sign is a stubborn, musty odor that just keeps coming back, no matter how many times you treat the spot. This is a classic indicator that urine has penetrated through the carpet and padding, and is now lingering in the subfloor. No consumer-grade product is going to fix that from the top down.
Signs You Need an Expert
Sometimes the decision is easy, but other times it’s a judgment call. Here are a few scenarios where getting a professional on the phone is your best bet:
- You Have Delicate or Expensive Carpet: If you have wool, silk, or other natural fiber carpets, the wrong cleaner can cause permanent damage. Pros know exactly what chemistry to use to treat these materials safely.
- The Stains Are Old and Everywhere: If you break out a blacklight and your carpet looks like a starry night sky, a professional cleaning is the only realistic way to tackle the problem comprehensively.
- You're Trying to Sell Your Home: Nothing kills a home sale faster than the smell of pet urine. A deep, professional pet odor treatment can mean the difference between a quick offer and a house that sits on the market for months.
Professionals bring in the heavy machinery, like commercial-grade hot water extraction systems. These machines flush the carpet with cleaning agents and then use powerful suction to pull the dirty water, urine, and allergens out from the padding, something a rental machine just can't match.
The demand for these deep-cleaning solutions is massive; the global carpet cleaner market was valued at USD 663.8 million in 2024, with pet owners being a huge driver of that number. A high-quality professional service can remove up to 98% of pet-related allergens from carpeting—a level of clean that's practically impossible to hit on your own. You can find more details about the benefits of professional pet stain cleaning on Searsclean.com.
When you need a true reset for your carpets, investing in a pro is the most effective way to go. Here in the Buford area, a service like Citrus Carpet Cleaning Buford is a fantastic choice. Their low-moisture, citrus-based system is specifically designed to knock out tough pet odors without leaving behind sticky, soapy residues, which means you get a deeper, longer-lasting clean.
Of course, even when you know the steps, you’re bound to run into a few specific questions. I get these all the time. Getting the right answers can mean the difference between a clean carpet and a costly mistake, so let's clear up a few things I see homeowners struggle with.
Can I Just Use Bleach or Ammonia on the Stains?
I can't stress this enough: never use bleach or ammonia-based cleaners on dog urine. It’s a recipe for disaster.
Bleach can chemically react with your carpet fibers, permanently discoloring them or, even worse, eating right through them. Ammonia is an even bigger mistake. Urine already contains ammonia, so when you add more, you're just making the scent marker stronger. You might as well put up a neon sign telling your dog, "Pee here again!"
How Do I Find Old, Invisible Urine Stains?
This is where you have to play detective. The absolute best tool for the job is a UV blacklight.
Dried urine leaves behind salt crystals that glow—or fluoresce—under ultraviolet light. To make it work, you need to get the room as dark as possible. Turn off all the lights, draw the shades, and then slowly scan your carpet with the blacklight. Any old, hidden accidents will light up with a yellowish-green glow, showing you exactly where you need to treat.
This method is a total game-changer. You can’t clean what you can’t see, and a blacklight makes sure no old stain gets left behind to cause those mystery odors that pop up on humid days.
Will Steam Cleaning Get Rid of the Smell?
Using a traditional steam cleaner is one of the worst things you can do for a urine stain. The intense heat from the steam will literally cook the urine proteins, permanently bonding them to your carpet fibers.
Once that happens, the stain and the odor are locked in for good. It becomes almost impossible to remove.
If you want to use a machine, make sure you pretreat every single spot with a good enzymatic cleaner first. After that, you'll need a carpet extractor or cleaner that doesn't use high heat to get the job done.
How Can I Stop My Dog From Peeing on the Carpet Again?
Preventing a repeat performance comes down to one thing: total odor elimination. If your dog can smell even the faintest trace of a past accident, their natural instinct is to re-mark that territory.
The only way to truly break this cycle is to use an enzymatic cleaner. It doesn't just mask the smell; it releases specialized bacteria that physically destroy the uric acid crystals that cause the odor. No crystals, no smell, no reason for your dog to go there again.
People often ask me if the same rules apply to other types of flooring. For the most part, yes. The methods for cleaning dog urine from area rugs follow the same principles, though you have the advantage of being able to move the rug for easier treatment. And remember, if accidents become a regular thing, it's always a good idea to check in with your vet to rule out any medical or behavioral issues.
When you're dealing with deep-set odors and stains that just won't budge, sometimes you need to call in a professional for a full reset. Citrus Carpet Cleaning Buford uses a unique low-moisture, citrus-based system that gets rid of pet odors for good without the sticky, soapy residues that attract more dirt.
Visit https://citruscarpetcleaningatlanta.com to get your "EXACT-imate" today.