

Jumping into a deep clean without a game plan can turn a quick sofa refresh into a full-blown furniture catastrophe. Before you even think about cleaning, you have to get the prep work done.
Think of it like this: you wouldn't paint a wall without taping the edges and putting down a drop cloth, right? Same principle applies here. Proper preparation is the difference between a sofa that looks brand new and one that, well, looks worse than when you started.
Your Pre-Cleaning Upholstery Checklist
This initial phase is all about working smarter, not harder. It ensures you’re not just cleaning, but cleaning correctly for your specific piece of furniture. Getting these few things right from the start will save you a world of hurt later.
First, Find and Decipher the Cleaning Code
Somewhere on your sofa, you'll find a small but mighty tag. It's usually tucked under a cushion or along the frame. This tag has a letter on it—the upholstery cleaning code—and it’s your roadmap to a successful clean. Ignoring this code is the fastest way to cause permanent damage like water rings, color bleeding, or even shrinking the fabric.
These codes are basically the manufacturer's direct instructions telling you how not to ruin your furniture. Let's break down what they mean.
Decoding Your Sofa's Cleaning Codes
This little tag holds the key to preventing a DIY disaster. Here's a quick guide to understanding what your sofa is trying to tell you.
| Code | What It Means | Approved Cleaning Method |
|---|---|---|
| W | Wet/Water-Based | You’re in luck! It’s safe to clean with water-based solutions. This is the most common and easiest type to clean yourself. |
| S | Solvent-Based | Stop right there. This fabric requires a special water-free solvent cleaner. Hitting it with water will likely leave a permanent mark. |
| W/S | Water or Solvent | This one is flexible. You can use either water-based products or solvent-based cleaners, giving you more options. |
| X | Vacuum Only | Do not use any liquid on this fabric—no water, no solvents. Cleaning is strictly limited to vacuuming or light brushing. |
If you find an 'S' or 'X' code, don't panic. It doesn’t mean your sofa is doomed to be dirty forever. It just means a DIY water-based approach is off the table, and calling in a professional like Citrus Carpet Cleaning Buford is your safest bet. For sofas with 'W' and 'W/S' codes, you can move ahead with confidence.
The Importance of a Thorough Vacuuming
I know, it’s tempting to jump right into scrubbing those stains. But trust me on this: vacuuming first is a non-negotiable step. All that surface dust, pet hair, and leftover crumbs will turn into a gritty, muddy mess the second you add a cleaning solution.
A deep vacuum pulls all that loose debris out, letting your cleaner get straight to work on the deep-down grime.
Don't just give it a quick once-over. Grab your vacuum's attachments and get serious.
- Upholstery Attachment: Use this wide, flat tool for the big areas—cushions, arms, and the back.
- Crevice Tool: This is your secret weapon. Use it to dig out years of lost popcorn, coins, and dust from between the cushions and in all the seams.
- Brush Attachment: Gently run this over the fabric first. It helps lift and loosen stubborn dirt so the vacuum can suck it right up.
Believe it or not, a really thorough vacuuming can remove up to 80% of the dry soil trapped in your sofa's fibers. This one simple act makes any cleaning that follows way more effective because the cleaner isn't fighting through a layer of dust and crumbs.
Always Spot-Test Your Cleaning Solution
Even if you have the right cleaning code and a cleaner you trust, you should never apply it to a visible spot without testing it first. Fabric dyes and finishes can be unpredictable, and this is your final safety check.
Pick a hidden spot—the back of the skirt, under a cushion, or on the frame underneath. Apply a small amount of your cleaner with a clean, white microfiber cloth, blot gently, and then let it dry completely.
Once it's dry, check for any color fading, bleeding, or weird texture changes. If the spot looks exactly the same, you’re good to go. This simple five-minute check can save you from a massive, and very visible, disaster.
The Low-Moisture Citrus Cleaning Method
Okay, with your sofa prepped and ready, it's time for the main event. You can forget about those harsh, sudsy chemicals that often leave a sticky residue behind or, worse, damage delicate fabrics. We're going to walk through a safer, surprisingly effective method using a low-moisture, citrus-based cleaner.
Honestly, this approach is a total game-changer for DIY upholstery cleaning. It lets you get professional-level results without the usual risks.
The whole idea is simple: less is more. Old-school cleaning methods often drench the fabric, which is a recipe for disaster. It can lead to water stains, mildew growth, and ridiculously long drying times. By using just enough moisture to get the job done, you clean the fabric thoroughly while protecting its integrity. The best part? Your couch will be ready to use in just a few hours.
Why Go with a Citrus-Based Cleaner?
Citrus-based cleaners are brilliant because they use the natural degreasing power of citrus extracts, like d-limonene, to break down dirt, grime, and oils. They do this without relying on aggressive, synthetic chemicals. This makes them a fantastic choice, especially if you have kids, pets, or anyone in the house who's sensitive to strong fumes.
If you want to dive deeper into the science, we have a whole article on why citrus-based cleaning is so effective.
This isn't just some niche trend, either. People are wising up to what they bring into their homes. The global green cleaning market is projected to make up 30% of the entire cleaning industry's revenue by 2025. It’s clear that safer, non-toxic options are what people want.
Mixing and Applying the Solution
The key here is to create a foam or suds, not a watery liquid. You're cleaning with the foam, not the water. Most quality citrus upholstery cleaners are concentrated, so you'll need to dilute them.
- Read the Label: Seriously, always start here. The manufacturer knows the best water-to-cleaner ratio. A common mix is about one part cleaner to 16 parts warm water, but don't guess.
- Whip It Up: In a small bucket, add your concentrate and warm water. Then, get in there with your hand or a whisk and agitate the mixture until you have a thick, rich foam sitting on top.
- Foam Only: This is the most important part. Dip just the bristles of your soft upholstery brush into the foam. Don't dunk the whole brush into the liquid. You want to transfer the suds to the fabric, not the water.
Remember the prep work? Those steps are crucial before you start applying any solution.
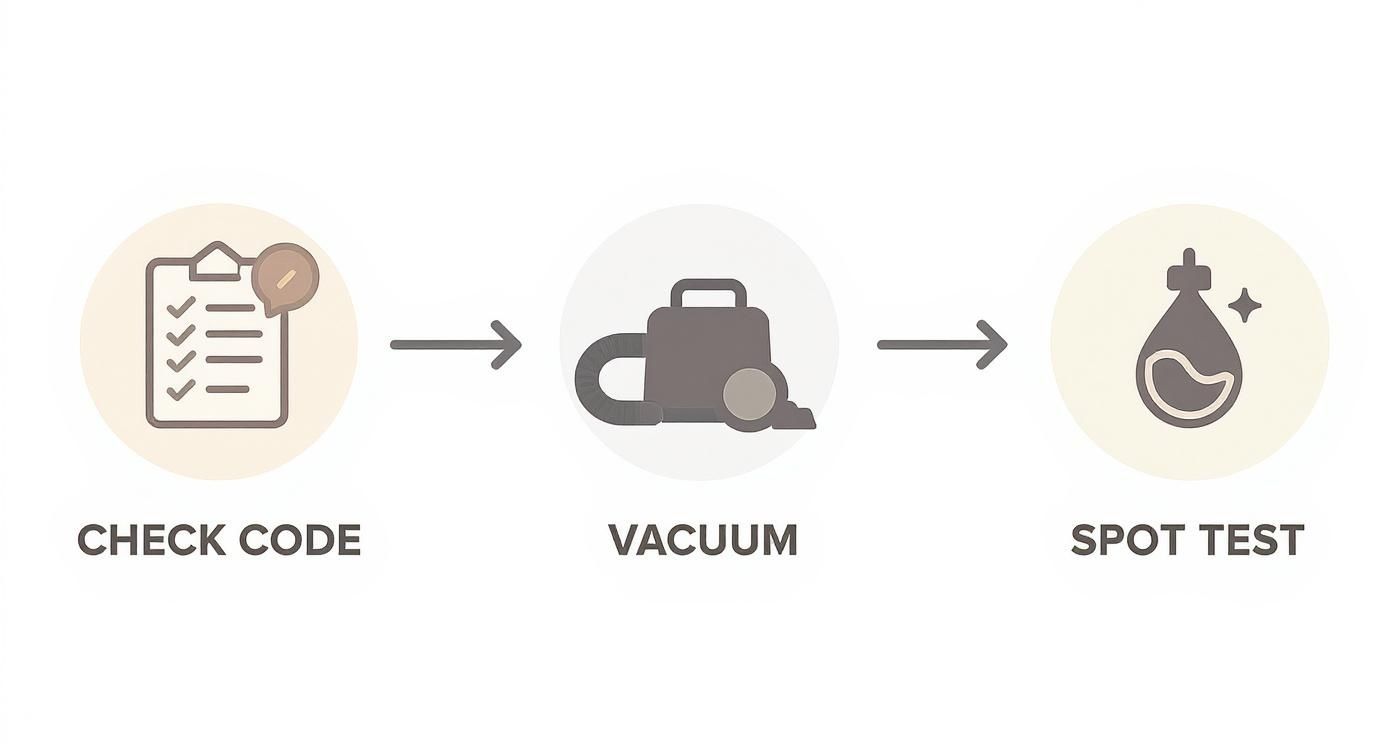
This visual just hammers home the point: checking the code, vacuuming like you mean it, and doing a spot test are the non-negotiable foundations for a successful clean.
The Gentle Agitation Technique
With foam on your brush, you're ready to clean. The trick is to work in small, manageable sections, maybe two-by-two feet at a time. This keeps the solution from drying out before you can work it in and lift it out.
Apply the foam and gently scrub the upholstery in small, circular motions. The goal isn't brute force; you're just agitating the fibers enough for the cleaner to do its job and lift the dirt to the surface. Let the citrus do the heavy lifting.
Pro Tip: If you see the foam disappearing fast, that’s a good sign! It means it's actively breaking down dirt. Just scoop up a bit more foam and keep working on that spot until the suds stay white and stable.
Blotting Away the Grime
Right after you agitate a section, you need to pull that dirt out. Grab your clean, dry microfiber towels. So many people make the mistake of wiping or rubbing here, which just smears the dirt around.
You need to blot.
- Fold a microfiber towel into a clean, flat square.
- Press it down firmly onto the damp section. Put some weight into it.
- Lift the towel straight up. You should see the grime it pulled from the fabric.
- Refold the towel to a fresh, dry spot and blot again. Keep going until the towel comes up clean.
This blotting action is what actually removes the dirty solution and all the soil it has suspended. You'll probably be shocked at what comes out. Just continue this process—apply foam, gently agitate, and blot—section by section until the whole sofa is done. Make sure to overlap your sections a little to avoid any cleaning lines.
The real beauty of this low-moisture method is how fast everything dries. Because the fabric never gets soaked, drying time is cut down dramatically. This not only gets your furniture back in commission quickly but also sidesteps the risk of mildew or that funky musty smell that plagues over-wetted upholstery.
How to Tackle Tough Stains and Spills
Even with perfect prep and a great deep cleaning routine, life happens. A glass of red wine goes flying, a pen leaks on a cushion, or the dog decides the sofa is the perfect place for a muddy paw print. It can feel like a total disaster, but most common spills are no big deal if you get to them quickly and use the right approach.
The secret isn't some magical, all-in-one spray. It's about matching your battle plan to the specific stain you're fighting.
The absolute worst thing you can do is panic and start scrubbing. That’s how you grind a stain deep into the upholstery fibers, basically making it a permanent part of the furniture. Instead, take a breath and remember the golden rule of spot treatment: blot, don't rub.
Your first job is to soak up as much of the spill as you can. Grab a clean, white microfiber cloth or a stack of paper towels, press down firmly, and lift straight up. You’re trying to pull the liquid out of the fabric, not spread it around.
DIY Solutions for Common Sofa Stains
Forget the generic cleaners that promise the world. Different stains are made of different stuff, so they need different solutions. I’ve put together a quick guide with some simple recipes for the usual suspects, using ingredients you probably already have in your kitchen.
| Stain Type | DIY Cleaning Recipe | How to Apply It |
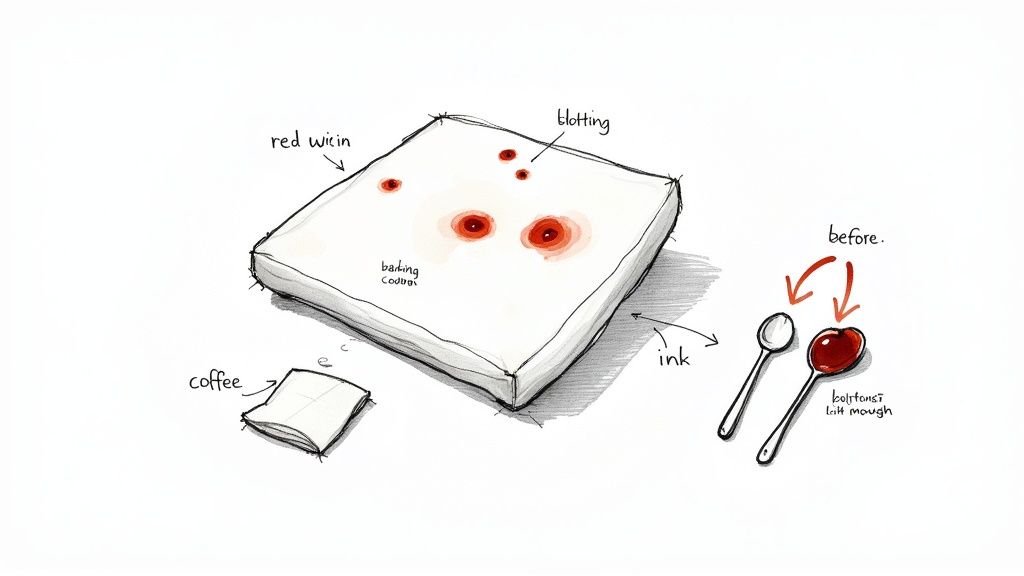
|---|---|---|
| Red Wine | A generous layer of table salt. | Blot the spill immediately. While the fabric is still damp, completely cover the stain with salt. Let it sit for a few hours—it will literally pull the wine pigment out of the fibers. Then, just vacuum it all up. |
| Coffee/Tea | A 1:1 mixture of white vinegar and water. | After blotting away the excess, lightly mist the stain with the solution. Give it 10-15 minutes to work, then gently blot again with a clean, damp cloth to rinse. |
| Ink | Rubbing alcohol or hairspray (one that contains alcohol). | Put a small amount on a cotton ball and gently dab the ink stain. Work from the outside edges inward to keep it from spreading. Follow up by blotting with a clean, damp cloth. |
| Grease/Oil | Baking soda or cornstarch. | Pile a thick layer directly onto the greasy spot. Let it sit for at least 20 minutes to absorb the oil, then vacuum it away. Treat any leftover discoloration after that. |
Just a word of caution: always, always test any cleaning solution on a hidden spot first. Under a cushion, on the back—somewhere no one will see. Even simple household stuff can react weirdly with certain fabrics, and a quick test will save you a massive headache later.
Dealing with Pet Accidents and Odors
Pet stains are a whole different ballgame. You’re not just cleaning what you can see; you’re fighting the bacteria and proteins that cause those stubborn, lingering smells. Your typical cleaner just throws some perfume on the problem, which fades and can even encourage your pet to mark the same spot again.
This is where you need a specialized tool: an enzymatic cleaner. These aren't just soaps. They use active enzymes to literally break down and digest the organic waste from urine, vomit, or feces.
Instead of just covering up the smell, this process completely destroys the molecules causing it. The odor isn't masked; it's gone for good.
When you use an enzymatic cleaner, be generous. You need to saturate the entire affected area, letting it soak down into the padding if you can. Then, just let it air dry. The enzymes need time to do their job properly. If you want to get into the science of it, you can learn more about what an enzymatic cleaner is and why nothing else really compares for pet messes.
The Art of Blotting and Rinsing
After you've treated the stain, you have one last step: rinsing the area without actually soaking your sofa. This is crucial for removing any leftover cleaning solution, which can become a sticky magnet for new dirt if you leave it behind.
- Grab a clean, white cloth and get it damp with plain water. Wring it out so it's barely wet.
- Gently blot the spot where you applied the cleaner. This will lift out any residue.
- Finish by pressing a completely dry cloth onto the area to pull out as much moisture as possible.
This careful blotting process is the key to preventing those annoying water rings, especially on fabrics like microfiber. It leaves you with a clean finish and no evidence that a spill ever even happened.
Drying and Grooming Your Sofa Upholstery

You’ve put in the elbow grease, but don't kick your feet up just yet. The final, and arguably most critical, step is getting that upholstery properly dry. If you rush it or just let it sit, you're inviting musty smells and even mildew to move in, which completely defeats the purpose of all your hard work.
The secret isn’t complicated: it’s all about air circulation. You absolutely have to get air moving across and around the entire sofa to pull that last bit of moisture out of the fibers.
Speeding Up the Drying Process
To make sure you're left with a fresh scent and not a damp funk, you need to be proactive. Just "letting it air dry" on its own, especially here in Georgia, is a recipe for trouble. You want to create an environment that practically forces evaporation.
- Open the Windows: If it’s not pouring rain, get those windows open. Creating a cross-breeze is a free and easy way to get things moving.
- Bring in the Fans: Turn on the ceiling fan. If you have a box fan or two, point them directly at the sofa.
- Use a Dehumidifier: On a sticky, humid day, a dehumidifier is your best friend. It will actively pull moisture from the air, which in turn helps pull it from your upholstery.
Here's a common mistake I see: people grab a hairdryer to speed things up. Bad idea. Direct heat can actually shrink or warp certain fabrics. Worse, it can permanently set any tiny remnant of a stain you might have missed. Always stick with cool, circulating air for the best and safest results.
Grooming the Fabric for a Flawless Finish
Once the upholstery feels totally dry to the touch, you might notice that the fibers look a little flat or matted down. This is totally normal, especially with fabrics like microfiber or velvet. This is where grooming comes in—it’s that final touch that brings back the sofa's original look and feel.
Grab a clean, soft-bristled upholstery brush and gently go over the entire sofa. Use light, overlapping strokes, keeping them all in the same direction. It’s a simple move, but it lifts the pile, fluffs up the fibers, and gets rid of any cleaning marks, leaving a clean, uniform finish.
While you're at it, you might notice a few stray pet hairs that came loose. For some extra pointers, check out our guide on the best way to get dog hair off a couch.
Before you throw the cushions back on, do one last check. Press your hand firmly into the deep corners and crevices—that's where moisture loves to hide. When you’re positive everything is bone-dry, you can reassemble your sofa and finally enjoy your fresh, clean furniture.
Keeping Your Sofa Looking Fresh
Alright, your sofa is spotless and the whole room feels brighter. So, how do you keep it that way? The real trick isn't a ton of hard work; it's about building a few smart, easy habits into your routine.
A little proactive care goes a long way. It stops everyday dirt from working its way deep into the fibers, which is exactly how a tiny spill turns into a stubborn, set-in stain. Staying on top of the small stuff is what keeps your sofa's fabric looking and feeling great for years.
Your Weekly and Monthly Upkeep Schedule
Think of this like any other household chore—a little effort on a regular basis makes a huge difference. Your vacuum is your best friend here. Once a week, grab the upholstery attachment and go over every surface. Don't skip the crevice tool; it's essential for getting into those seams where crumbs, dust, and pet hair love to collect.
Once a month, spend a few extra minutes on some deeper TLC:
- Fluff and Rotate Cushions: This is a big one. It prevents those dreaded permanent butt-dents and ensures the cushions wear out evenly.
- Wipe Down the Bones: Give any wood or metal legs and frames a quick wipe with a cleaner made for that material.
- Attack Spills Immediately: The golden rule of upholstery care. The longer a spill sits, the better its chances of becoming a permanent resident. Always blot, never rub!
If you want to understand why this regular cleaning is so crucial, you have to see what's really going on at a microscopic level. It helps to understand the hidden life inside your fabrics and see just how quickly dirt and grime build up, causing that dull look and musty smell.
Protective Measures for Long-Term Freshness
Beyond cleaning, a few protective moves can shield your sofa from the realities of daily life. If your couch is in a high-traffic zone—especially if you have kids or pets—consider tossing a few stylish throws or blankets over the most popular seating spots. They're a breeze to wash and can even add a nice decorative touch.
For an extra layer of defense, think about a fabric protector spray. These products create an invisible barrier on the fabric that repels liquids, giving you precious extra seconds to blot up a spill before it has a chance to soak in and stain.
Just like with any cleaning product, always test a fabric protector on a small, hidden area first to be safe. Applying a quick coat after a professional cleaning can make your weekly maintenance even more effective, keeping that "just cleaned" look around for a whole lot longer. It's a simple step that's key to learning how to clean sofas upholstery like the pros do.
Knowing When to Call a Professional
While this citrus cleaning method is a fantastic tool to have in your back pocket, some situations are just better left to the pros. Knowing your limits isn't giving up; it's being smart about protecting your furniture from a costly mistake.
It's empowering to know how to clean your own sofa, but real wisdom is knowing when to tag in an expert.
Certain red flags immediately tell me a DIY approach is too risky. If you're looking at delicate or exotic fabrics like silk, linen, or true velvet, the margin for error is razor-thin. One wrong move can cause irreversible damage. The same goes for serious water damage or ancient, set-in stains that have basically bonded with the fabric fibers. Those often require commercial-grade equipment to fix safely.
Signs a Professional Cleaning Is Needed
Sometimes, the problem is just bigger than your home toolkit. If you spot any of these issues, it’s a clear signal to call for backup and avoid turning a stain into a disaster.
- Your sofa has an "S" or "X" cleaning code. These are non-negotiable. They strictly forbid any water-based cleaning, which means our citrus method is completely off the table. Professionals have the specific solvent-based cleaners required for these fabrics.
- The stain is a total mystery. If you have no clue what caused the stain, you’re just guessing at the treatment. A pro can identify the source and use the correct agent to break it down without harming the fabric.
- You're dealing with a deep, persistent odor. Smells from mold, mildew, or old pet accidents don't just sit on the surface; they soak deep into the padding. Professionals use things like ozone treatments or powerful, specialized sanitizers that DIY methods simply can't replicate.
Professional services aren’t just for disasters. They use powerful, truck-mounted, low-moisture systems that provide a much deeper clean than portable equipment can, extracting more dirt and allergens while ensuring rapid dry times. This is why their results often look so crisp and last longer.
The demand for this kind of expert help is skyrocketing. The global market for carpet and upholstery cleaning is projected to hit an incredible USD 120.8 billion by 2035, and upholstery cleaning is a huge piece of that pie. This growth shows that people really understand the value professionals bring to the table. You can learn more about the upholstery cleaning services market on futuremarketinsights.com.
The Benefits of Hiring an Expert
Beyond just having the right gear, professionals bring years of hands-on experience. They can accurately identify your upholstery fabric on sight and immediately know the safest, most effective way to clean it.
When you're looking for help, it pays to understand what they offer. Many experts provide professional steam cleaning services for tough, durable fabrics, or specialized low-moisture techniques for the more sensitive ones.
Ultimately, hiring a pro saves you a ton of time and gives you peace of mind. A reputable company like Citrus Carpet Cleaning Buford stands behind their work, guaranteeing your sofa is not just cleaned, but cared for the right way. It's the best way to protect your investment and get your furniture looking its absolute best, without any of the guesswork.
Even after you’ve got your game plan ready, it’s natural for questions to pop up. Cleaning a sofa isn’t just about the elbow grease; knowing a few key details can be the difference between a great result and a costly mistake. Let’s tackle some of the most common questions I hear all the time.
How Often Should I Deep Clean My Sofa Upholstery?
For most households, a good, thorough deep cleaning every 12 to 18 months is the sweet spot. This schedule is perfect for preventing that slow buildup of dirt and body oils that can actually wear down your fabric fibers over time, making them look dull and old before their time.
But let's be realistic—your sofa's environment is the real deciding factor. If you've got pets, kids, or family members with allergies, you'll want to ramp that up to every 6 to 12 months. Staying on top of it this way does wonders for your home's hygiene and keeps the air quality much fresher.
Can I Use a Steam Cleaner on Any Type of Sofa?
Absolutely not. This is a big one. While a steam cleaner sounds like the ultimate weapon against dirt, it can be a total disaster for the wrong fabric. It’s usually fine for tough synthetic fabrics, but you risk permanent damage with natural fibers.
- Fabrics to Avoid: Be extremely careful with materials like silk, wool, and even certain types of velvet. They're notorious for shrinking, leaving water stains, or having their colors bleed when hit with high heat and moisture.
- Check the Code: This is non-negotiable. Go back to that cleaning tag on your sofa. If you see an 'S' (solvent-only) or an 'X' (vacuum-only), any water-based cleaning, including steam, is completely off the table.
Using the wrong method isn't just a cleaning goof; it can flat-out ruin your furniture. If you're ever in doubt, a low-moisture approach is always, always a safer bet than blasting it with high-heat steam.
What's the Best Way to Dry a Sofa After Cleaning?
Proper drying all comes down to one simple thing: air circulation. Your goal is to get that moisture out of the fabric as fast as you can to stop any musty smells or mildew from even thinking about starting.
Crack open some windows to get a nice cross-breeze going. If you have a ceiling fan, turn it on. You can also set up a couple of portable fans and aim them across the sofa's surface. It might be tempting to grab a hairdryer to speed things up, but don't do it—the focused heat can easily damage the fibers.
Honestly, the best drying strategy is all about prevention. When you use a low-moisture cleaning method from the get-go, you slash the drying time needed.
Ready to skip the DIY and get a guaranteed fresh clean? The team at Citrus Carpet Cleaning Buford uses a professional low-moisture, citrus-based system to safely and effectively restore your upholstery. Get your free EXACT-imate today!